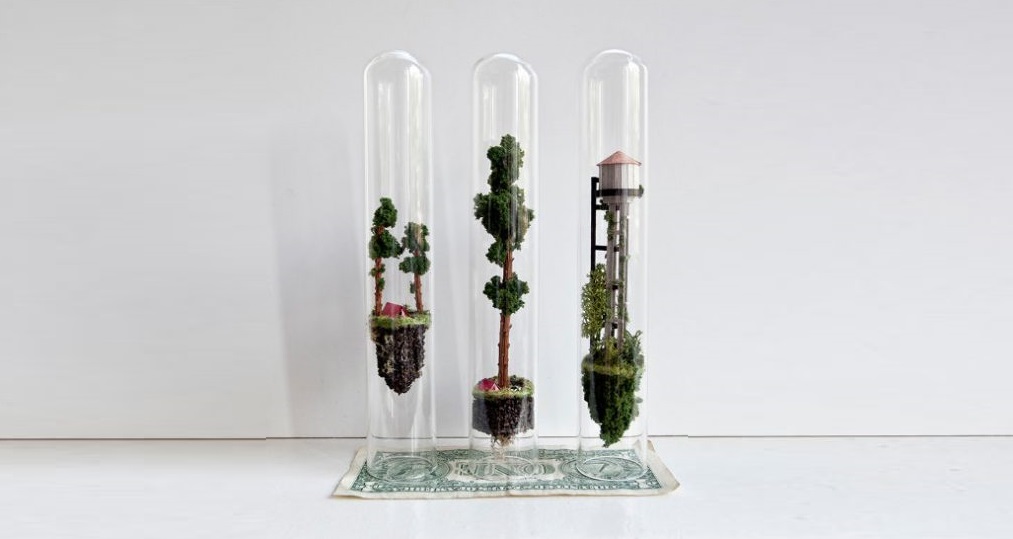
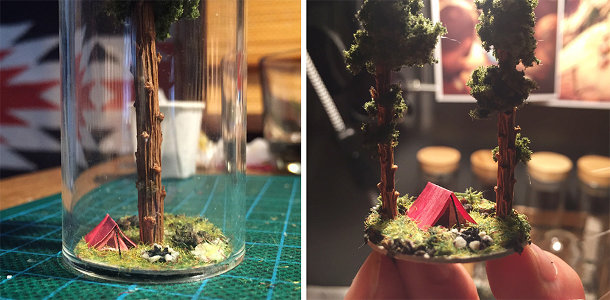
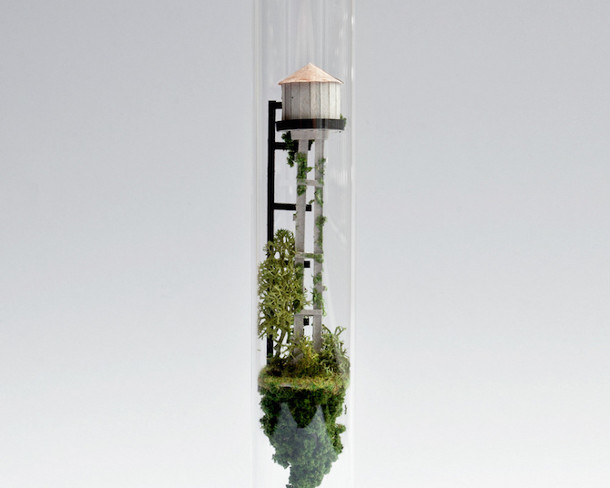
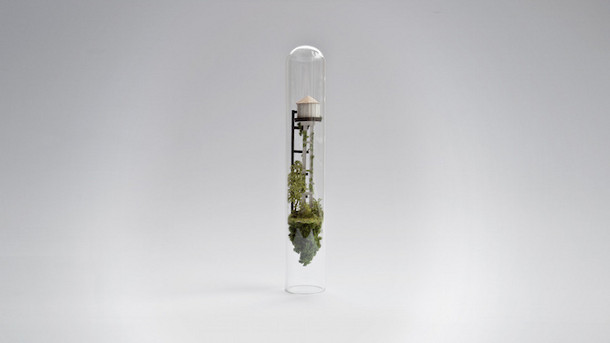
Guess ships aren’t the only thing people like to put into bottles.
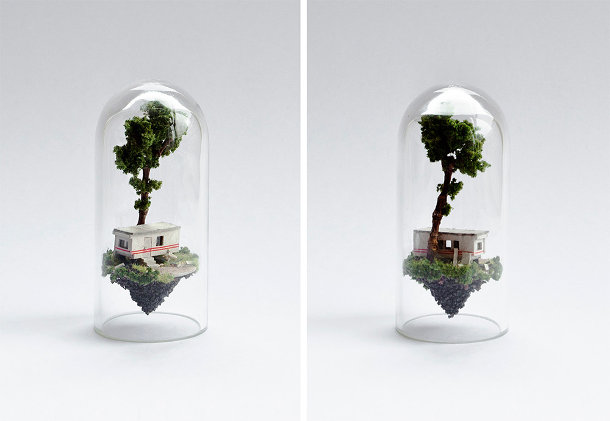
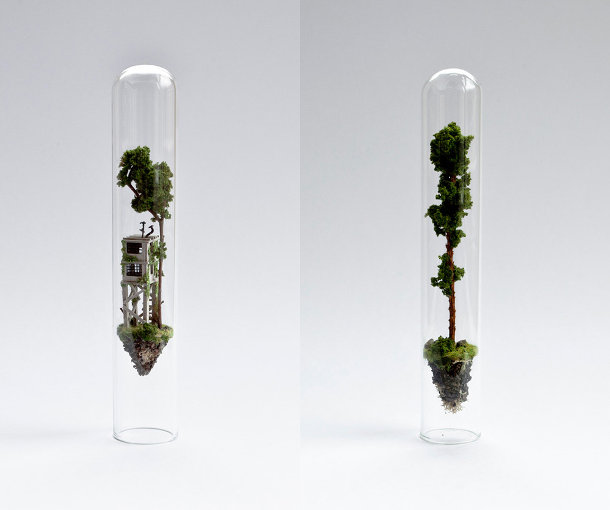
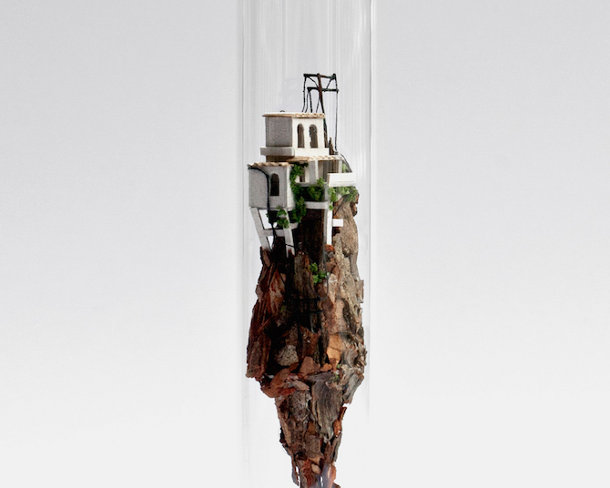
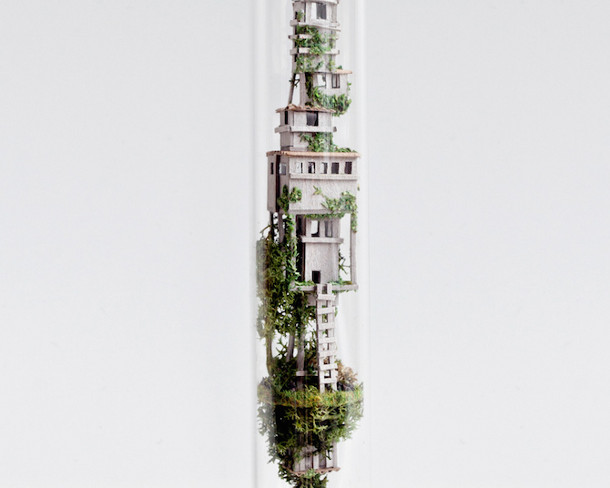
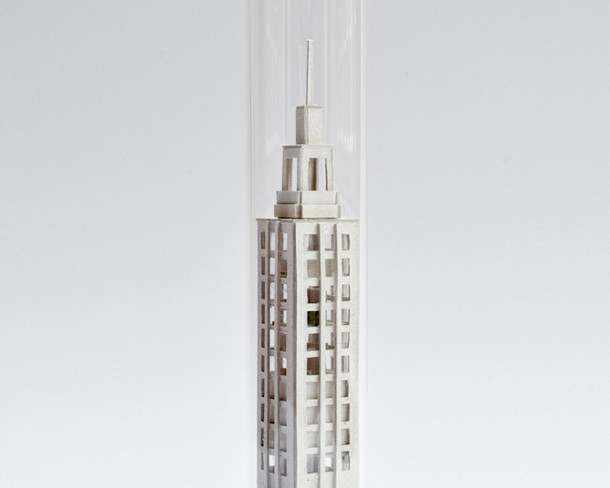
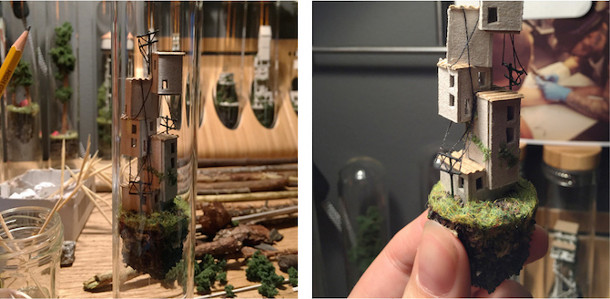
Dutch artist Rosa de Jong is back with new miniature homes that float in glass test tubes. The small buildings, trees and other living objects are part of a series called Micro Matter.
For more of Rosa’s work, click here.
Gallery of this bunch of Rosa’s work:
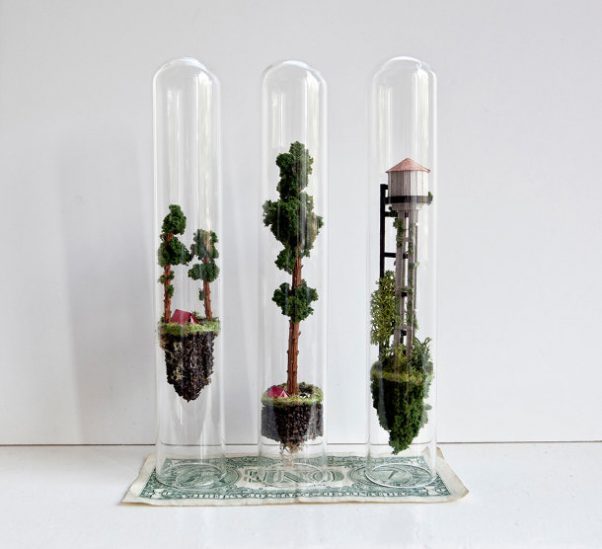
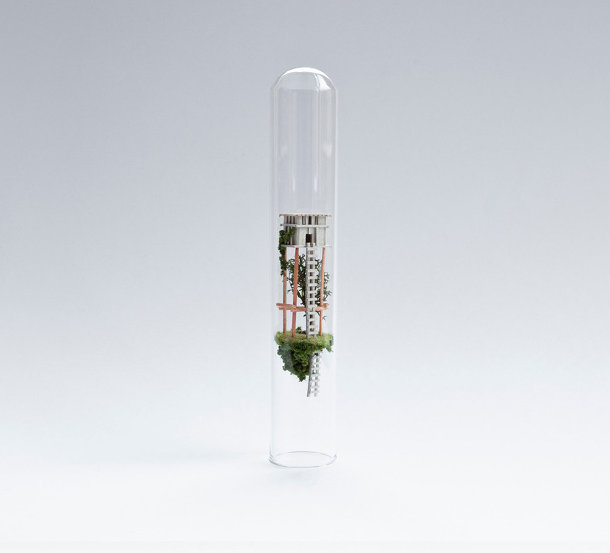
Guess what? Rosa also did skyscapers, water towers, and other fantastic buildings!


How to Take a $10 Table from This to That! Flip Your Own Flop
Crafting is fun and sometimes it’s easy. Other times we find ourselves challenged and biting off more than we can chew. So what about the craft projects we take on that don’t go our way? Do not get discouraged! Whether your piece just did not turn out the way you wanted, or was a total dud you can always fix it.
I have a ten dollar table purchased from the Salvation Army that was a blank canvas when I started and has now seen multiple layers of paint. This is not because I’m heavy handed with a brush, but rather because I was not satisfied with my design, twice. Here was my second try on the table. I finished and was happy for a short time. After a while it became overwhelming in color and underwhelming in design. It was time for a change.
I took my flop of a table and sanded it all over. I was thorough because I wanted to avoid the extra step of priming the table and felt that the charcoal color I had chosen to replace it was dark enough for complete coverage. I began to cover the old design with the charcoal color and brainstorm my new design. I chose to do a plaid pattern. I was determined to flip this flop with no extra cost so I committed to paints I already had. I used a metallic shade of white and a metallic cream color to accent the dark matte charcoal paint I used as my base. Before doing a detailed pattern I recommend sketching your image/design elsewhere or in pencil on the piece itself. For my piece, I used pencil to create the lines I needed for the table top pattern.

My next step was to color in the lines. I used my metallic paints and created a fourth color to my pattern by mixing both metallic colors for a new shade. As you can see, I did not concern myself with neat lines at this stage. I focused more on covering the charcoal to allow my accent colors to pop.
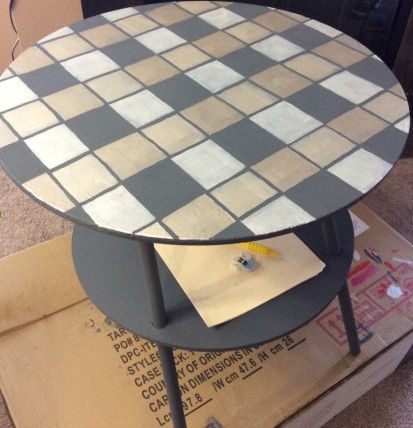
As I moved through my work I noticed that the table top mimicked a tile pattern more than plaid so I changed course. Once I completed the messy filling of my traced squares, I went through with each color and cleaned up the lines to create more definition. My flop got flipped into a piece I could be proud of.

This is not to tell you to create a tile design or promote the colors I chose. This is to remind you that your flop can always be flipped!
By Alison LaPaglia
The Art of Distressing Furniture: Distress to De-stress
Life can be complicated and messy but distressing furniture is not. Well, it may be a little messy but it is certainly not complicated. If you are new to DIY then this could be a perfect start. If you are more experienced you will appreciate the unique look you can achieve with little effort! First, find an old and tired piece of furniture that needs a new, fresh look. Some of you may already have one in your home and others may need to search elsewhere. I always recommend looking at discounted places such as thrift stores and consignment warehouses. There is something about finding the right piece and the right price that makes it all worthwhile! Plus, this will help keep costs minimal for the project. Next, make sure you have a paint brush with firm bristles, paint with a matte finish, and sand paper. You can find all of these items at your local craft store.
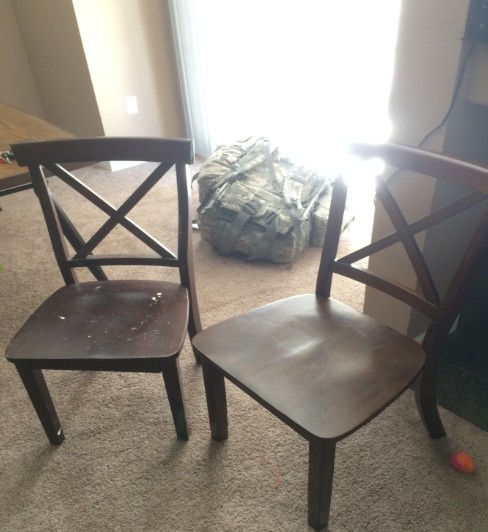
My project started with the search for the perfect farmhouse chairs to complete my kitchen table. I averaged about $35.00 dollars a chair and found them separately at different consignment warehouses. I wanted the chairs the mimic each other in style but not match as a set would. I went home with two wooden cross back chairs. My first step was to sand the chairs. This is a quick step because it does not need to be thorough. You only need to scratch the surface enough to tear the finish or stain the wood may already have. If the piece you chose has already been painted you may want to sand more at this step or consider a primer before painting with your color. Your piece will be dusty so clean the dust off with a dry rag or paper towel.
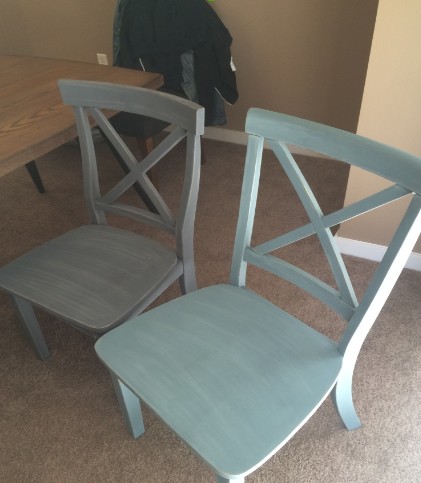
Now you are ready to paint! For my project I chose the River Rock and Charcoal Martha Stewart vintage décor craft paints sold at Michaels. I wanted my colors to be complimentary not matching. When choosing your paint make sure to find a matte or chalk like finish. Now, turn up the music or your current Netflix show and get to work! Cover your piece in one to two coats of paint depending on coverage. Do not concern yourself with proper brush strokes. This piece is not meant to look pristine. Once you are done let your paint dry overnight before sanding the edges.
Distressing is easy and when your paint has dried, you are ready to get started. Take sand paper and sand the edges of your piece. You can do this as little or as much as you would like. I chose to do it just enough that the wood came through in various spots. Then I lightly sanded the seat of the chair to give the paint a worn look, but not enough to expose the wood.
When you have finished dust off your piece and put it on display!
By Alison LaPaglia